> ## Documentation Index
> Fetch the complete documentation index at: https://docs.iblueprint.ai/llms.txt
> Use this file to discover all available pages before exploring further.
# Create a Blueprint
> Turn a plain-language goal into a testable workflow—or build one manually in the Blueprint Editor.
## When to use a Blueprint
Use a Blueprint when a task needs multiple steps, AI decisions, tools, knowledge, data, or human review. Start by discovering a reusable workflow in Public Libraries or your organization libraries, then create a new Blueprint when you need a workflow tailored to your team.
## 1. Open the Blueprint creator
1. From the signed-in Launchpad, select **New**.
2. Choose **New Blueprint**.
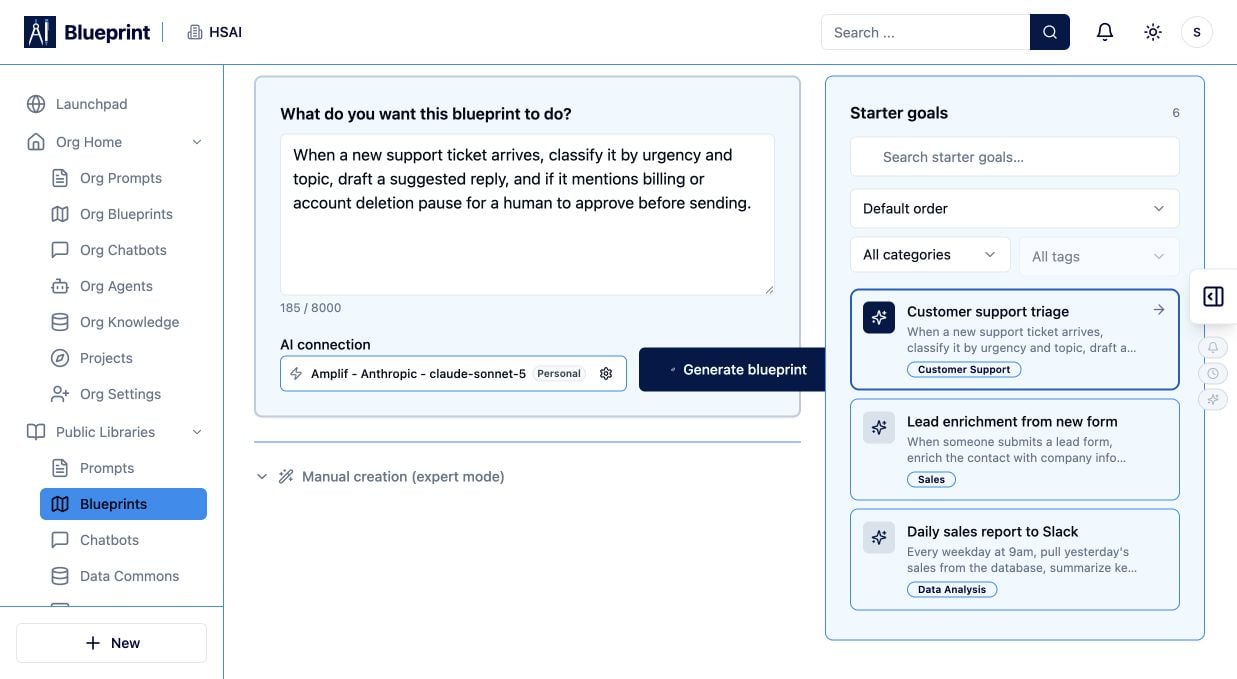
Blueprint opens a goal-driven creator with starter goals on the left and a plain-language description field in the main panel.
## 2. Describe the goal
In **What do you want this blueprint to do?**, describe the outcome and the major steps in plain English. Include the trigger, important decisions, systems or data involved, and where a person should review or approve work. The field supports up to 8,000 characters.
For example: “When a new support ticket arrives, classify it by urgency and topic, draft a suggested reply, and pause for human approval for billing or account-deletion requests.”
## 3. Choose an AI connection and model
Review the AI connection shown below the goal. If needed, select **Change AI connection or model** and choose the connection and model that your organization permits. The selected connection is used while Blueprint designs the workflow.
## 4. Start from a starter goal or your own description
Use the starter-goal list when a common pattern matches your work. The creator currently includes goals such as customer support triage, lead enrichment, a daily sales report, a content pipeline with human approval, invoice extraction, and meeting notes to action items.
You can also write your own goal from scratch. Choose the path that gives you the clearest starting point, then review the generated structure instead of treating it as final.
 ## 5. Generate the workflow
1. Confirm the goal and AI connection.
2. Select **Generate blueprint**.
3. Wait while Blueprint analyzes the goal and selects nodes.
Generation creates a draft workflow. Treat the first version as a starting point: inspect the nodes, connections, inputs, outputs, and human-review points before testing it.
## 6. Review the generated draft
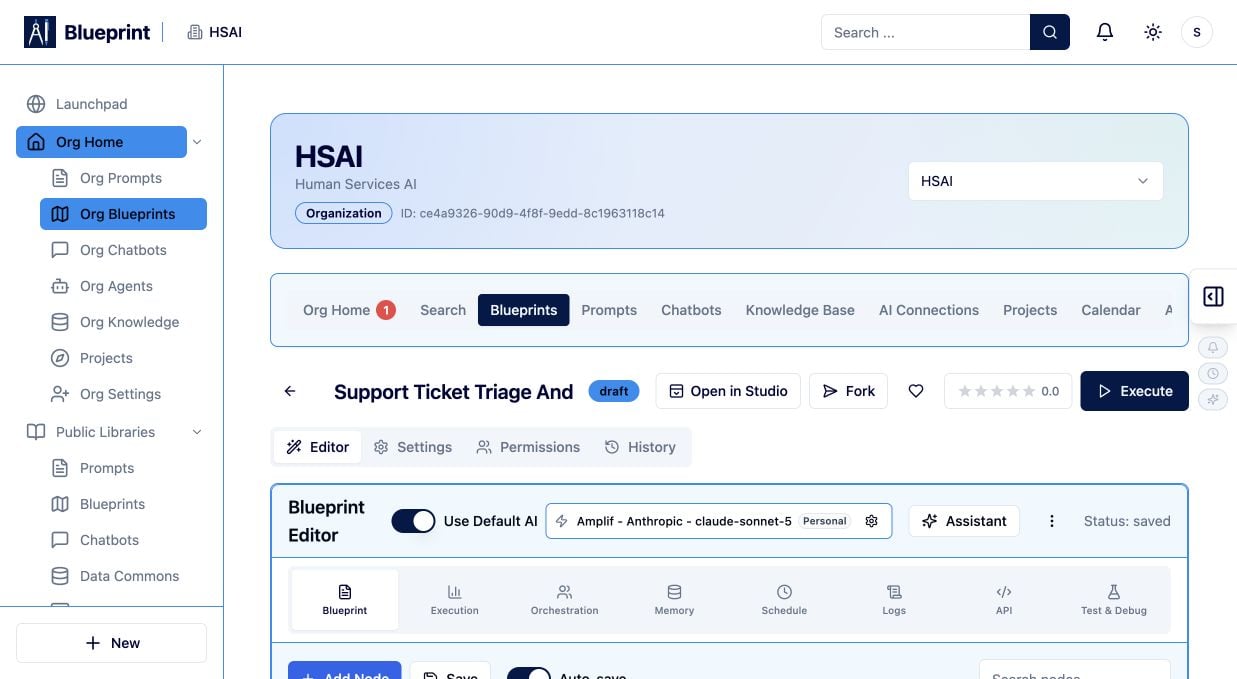
In the Blueprint Editor, review the draft title and the nodes Blueprint created. The editor provides **Editor**, **Settings**, **Permissions**, and **History** views. Use the inner workflow views to inspect the Blueprint, execution, orchestration, memory, schedule, and logs.
Check each node’s purpose and sequence. Confirm that the workflow receives the information it needs, that sensitive cases pause at the right point, and that notifications or external actions happen only when intended.
## 5. Generate the workflow
1. Confirm the goal and AI connection.
2. Select **Generate blueprint**.
3. Wait while Blueprint analyzes the goal and selects nodes.
Generation creates a draft workflow. Treat the first version as a starting point: inspect the nodes, connections, inputs, outputs, and human-review points before testing it.
## 6. Review the generated draft
In the Blueprint Editor, review the draft title and the nodes Blueprint created. The editor provides **Editor**, **Settings**, **Permissions**, and **History** views. Use the inner workflow views to inspect the Blueprint, execution, orchestration, memory, schedule, and logs.
Check each node’s purpose and sequence. Confirm that the workflow receives the information it needs, that sensitive cases pause at the right point, and that notifications or external actions happen only when intended.
 ## 7. Use manual creation when you need full control
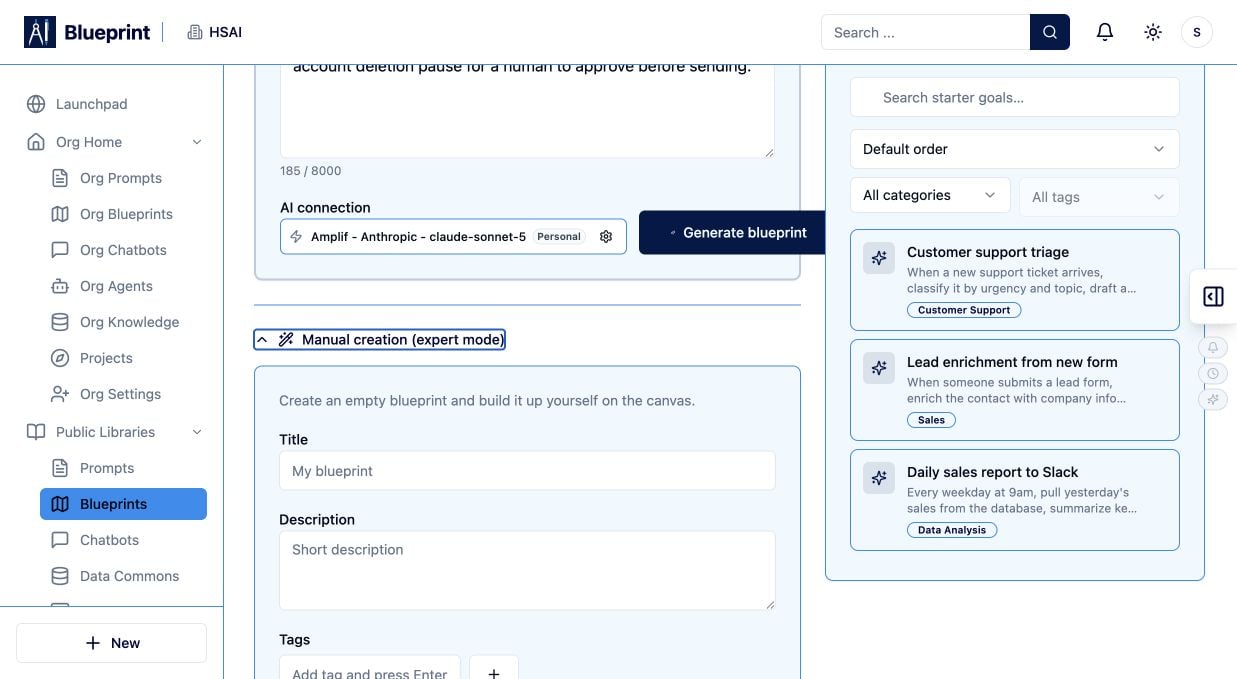
If you prefer to design the workflow yourself, choose **Manual creation (expert mode)**. Enter a title, short description, and tags, then select **Create empty blueprint**. Add and configure the nodes yourself in the Blueprint Editor.
## 7. Use manual creation when you need full control
If you prefer to design the workflow yourself, choose **Manual creation (expert mode)**. Enter a title, short description, and tags, then select **Create empty blueprint**. Add and configure the nodes yourself in the Blueprint Editor.
 ## 8. Test with Test & Debug
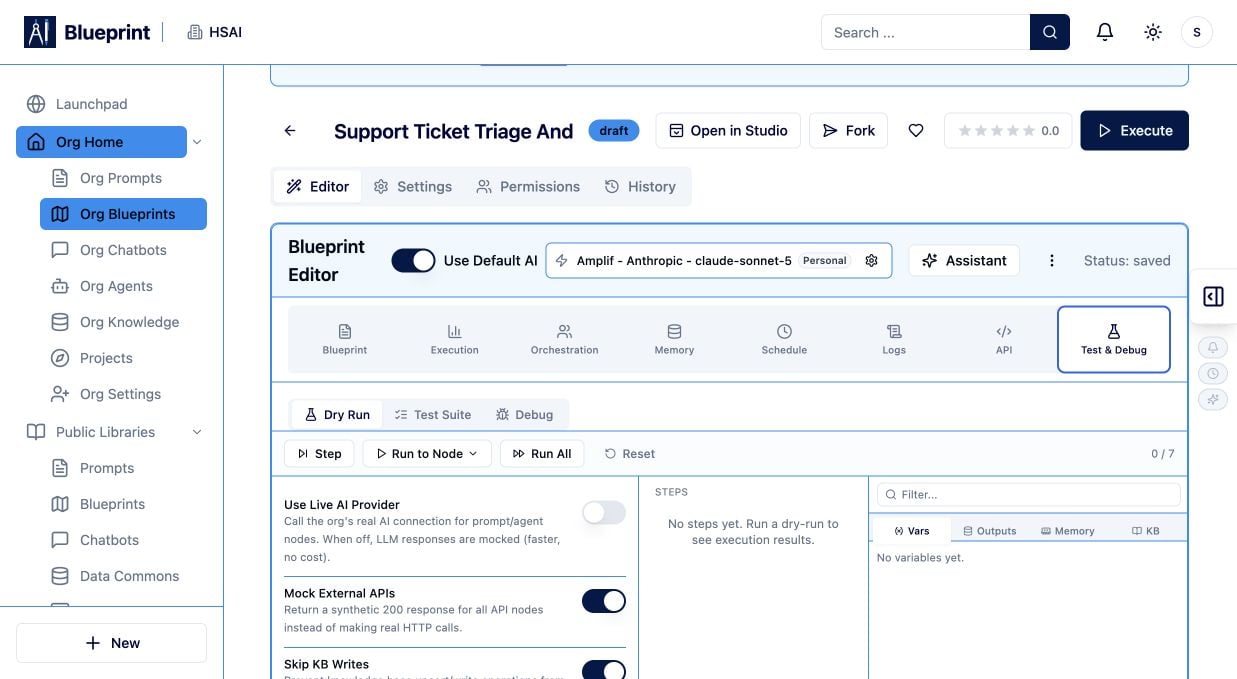
1. Open **Test & Debug** inside the editor.
2. Choose **Dry Run**, **Test Suite**, or **Debug** based on what you need to learn.
3. Use **Step**, **Run to Node**, **Run All**, or **Reset** to control the run.
4. Enter values for detected input variables such as `{{inputData}}`.
5. Choose whether to use the live AI provider or mocked behavior.
6. Decide whether to mock external APIs, skip knowledge-base writes, skip persistent-memory writes, skip notifications, or auto-approve human nodes.
7. Set a breakpoint with **Pause Before Node** when you need to inspect an intermediate state.
8. Select **Run Dry-Run**, then inspect Steps, Vars, Outputs, Memory, and KB.
Start with mocked behavior while you are checking structure and data flow. Use live AI only when you are ready to evaluate realistic model behavior and have confirmed the test data is appropriate.
## 8. Test with Test & Debug
1. Open **Test & Debug** inside the editor.
2. Choose **Dry Run**, **Test Suite**, or **Debug** based on what you need to learn.
3. Use **Step**, **Run to Node**, **Run All**, or **Reset** to control the run.
4. Enter values for detected input variables such as `{{inputData}}`.
5. Choose whether to use the live AI provider or mocked behavior.
6. Decide whether to mock external APIs, skip knowledge-base writes, skip persistent-memory writes, skip notifications, or auto-approve human nodes.
7. Set a breakpoint with **Pause Before Node** when you need to inspect an intermediate state.
8. Select **Run Dry-Run**, then inspect Steps, Vars, Outputs, Memory, and KB.
Start with mocked behavior while you are checking structure and data flow. Use live AI only when you are ready to evaluate realistic model behavior and have confirmed the test data is appropriate.
 ## 9. Save, govern, and prepare for release
Use **Save** and review the saved state before sharing. Confirm permissions, connected resources, human-review gates, and visibility. Keep the draft private while testing; publish or share only when the workflow meets your organization’s quality and governance expectations.
## Blueprint creation checklist
* The goal names the trigger, outcome, key decisions, and review points.
* Every generated node has a clear purpose and valid inputs and outputs.
* Normal, incomplete, and edge-case paths have been dry-run.
* Human approval and external actions are intentional.
* Permissions and visibility match the people and systems that should use the workflow.
## 9. Save, govern, and prepare for release
Use **Save** and review the saved state before sharing. Confirm permissions, connected resources, human-review gates, and visibility. Keep the draft private while testing; publish or share only when the workflow meets your organization’s quality and governance expectations.
## Blueprint creation checklist
* The goal names the trigger, outcome, key decisions, and review points.
* Every generated node has a clear purpose and valid inputs and outputs.
* Normal, incomplete, and edge-case paths have been dry-run.
* Human approval and external actions are intentional.
* Permissions and visibility match the people and systems that should use the workflow.