> ## Documentation Index
> Fetch the complete documentation index at: https://docs.iblueprint.ai/llms.txt
> Use this file to discover all available pages before exploring further.
# Create a Prompt
> Build reusable instructions with templates, variables, classification, sharing, and visibility in Blueprint.
## When to use a Prompt
Use a Prompt when you want to turn a focused instruction into a reusable asset that people can run, compare, and improve. Start with discovery in [Public Libraries](/using-public-libraries-in-blueprint) or your organization libraries, then create a new Prompt when you need a pattern of your own.
## 1. Open the Prompt creator
1. From the signed-in Launchpad, select **New**.
2. Choose **New Prompt**.
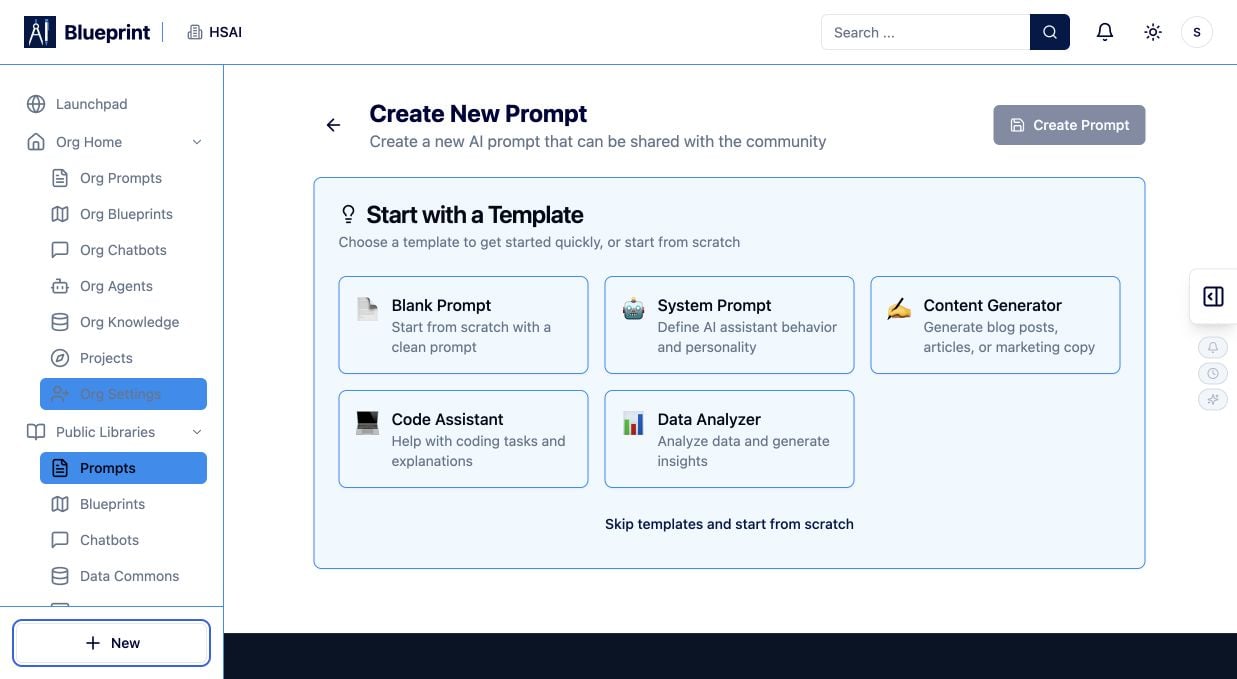
Blueprint opens the template chooser. You can start from a template or skip templates and begin from scratch.
 ## 2. Choose a starting point
Select **Blank Prompt** for a clean editor, or choose a starter such as System Prompt, Content Generator, Code Assistant, or Data Analyzer. Use a template when its structure matches your goal; otherwise select **Skip templates and start from scratch**.
## 3. Add the basic information
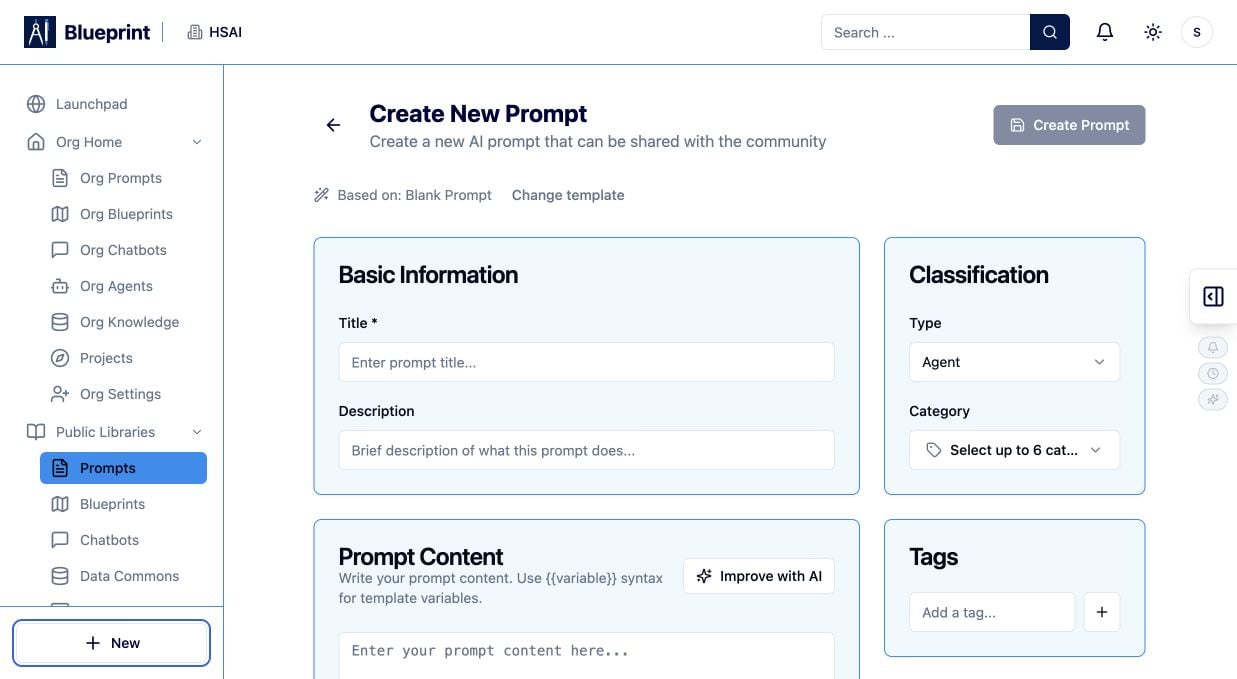
1. Enter a clear, task-oriented **Title**.
2. Add a short **Description** that explains what the Prompt does and who should use it.
Good metadata makes the Prompt easier to find and evaluate later in a library.
## 4. Write the Prompt content
In **Prompt Content**, write the instruction Blueprint should follow. Define the task, relevant context, constraints, and the format you want returned. Use `{{variable}}` syntax for values that should be supplied at run time.
Use **Improve with AI** when you want help tightening the draft, then review every suggested change yourself.
## 2. Choose a starting point
Select **Blank Prompt** for a clean editor, or choose a starter such as System Prompt, Content Generator, Code Assistant, or Data Analyzer. Use a template when its structure matches your goal; otherwise select **Skip templates and start from scratch**.
## 3. Add the basic information
1. Enter a clear, task-oriented **Title**.
2. Add a short **Description** that explains what the Prompt does and who should use it.
Good metadata makes the Prompt easier to find and evaluate later in a library.
## 4. Write the Prompt content
In **Prompt Content**, write the instruction Blueprint should follow. Define the task, relevant context, constraints, and the format you want returned. Use `{{variable}}` syntax for values that should be supplied at run time.
Use **Improve with AI** when you want help tightening the draft, then review every suggested change yourself.
 ## 5. Classify and tag the Prompt
1. Choose the appropriate **Type**.
2. Select up to six categories that describe the work.
3. Add concise tags so teammates can search and filter the Prompt later.
## 6. Set organization sharing
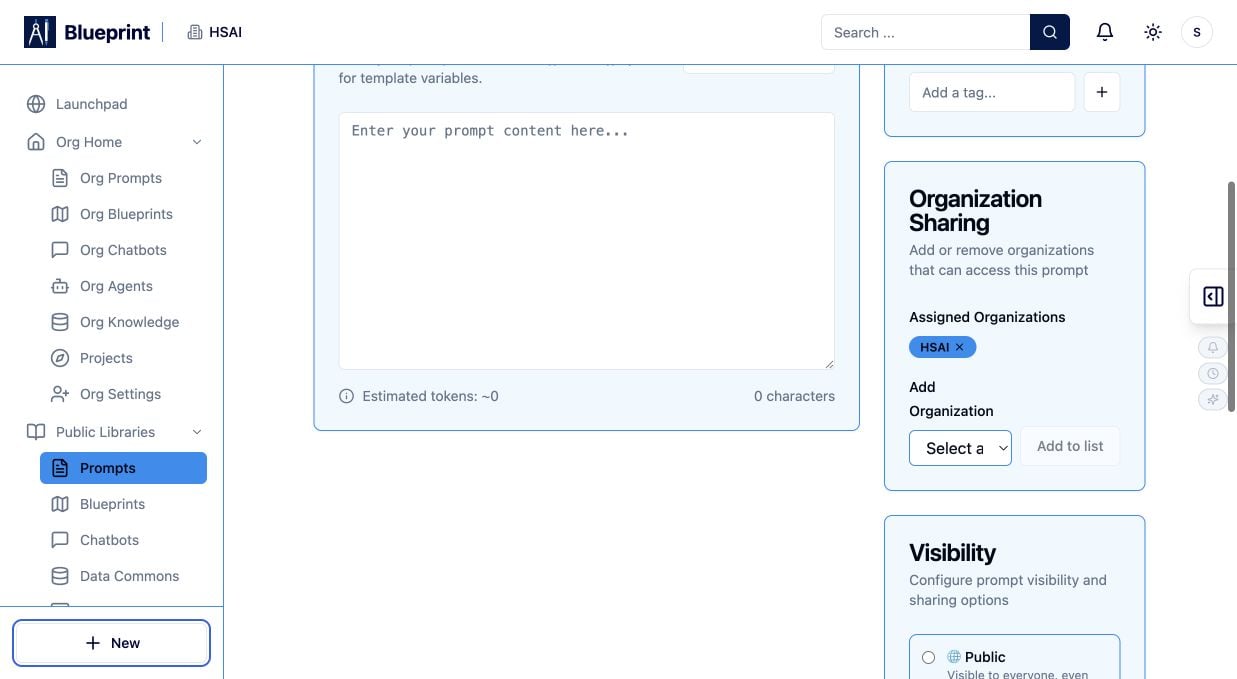
Review the organizations listed under **Organization Sharing**. Keep the default organization when the Prompt is intended for that team, remove it when it is not, or add another organization when the Prompt should be available to an additional governed workspace.
Before sharing, confirm that the Prompt does not expose sensitive instructions or depend on information the receiving organization should not access.
## 5. Classify and tag the Prompt
1. Choose the appropriate **Type**.
2. Select up to six categories that describe the work.
3. Add concise tags so teammates can search and filter the Prompt later.
## 6. Set organization sharing
Review the organizations listed under **Organization Sharing**. Keep the default organization when the Prompt is intended for that team, remove it when it is not, or add another organization when the Prompt should be available to an additional governed workspace.
Before sharing, confirm that the Prompt does not expose sensitive instructions or depend on information the receiving organization should not access.
 ## 7. Choose visibility
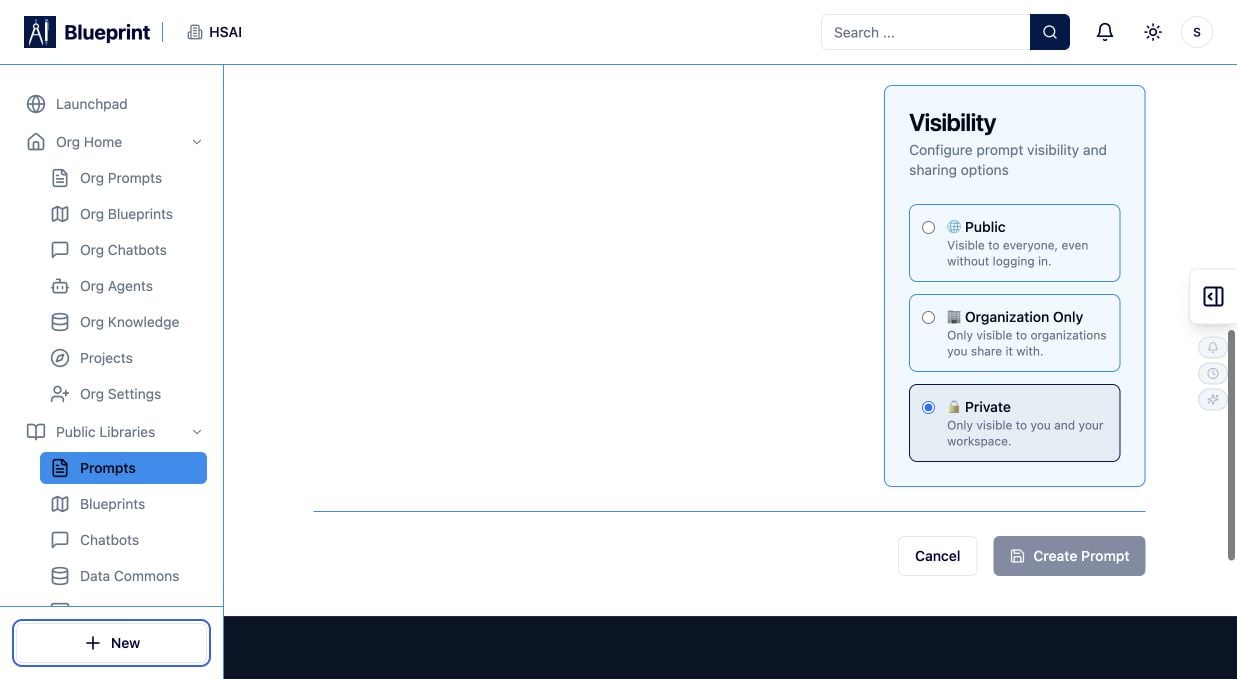
Select the visibility that matches the Prompt’s lifecycle:
* **Private** — only you or the workspace can see it while you are drafting and testing.
* **Organization Only** — available to the organizations you share it with.
* **Public** — visible to everyone, including people who are not signed in.
A practical workflow is to start Private, test with representative inputs, and broaden access only after the Prompt is ready.
## 7. Choose visibility
Select the visibility that matches the Prompt’s lifecycle:
* **Private** — only you or the workspace can see it while you are drafting and testing.
* **Organization Only** — available to the organizations you share it with.
* **Public** — visible to everyone, including people who are not signed in.
A practical workflow is to start Private, test with representative inputs, and broaden access only after the Prompt is ready.
 ## 8. Create and refine
1. Review the title, description, content, categories, tags, organization sharing, and visibility.
2. Select **Create Prompt**.
3. Open the new Prompt from your library and run it with representative inputs.
4. Compare the result with your intended output, revise the instruction, and repeat until it is reliable.
**Tip:** Keep examples and expected output formats close to the instruction. Clear inputs and constraints make a Prompt easier for someone else to reuse.
## Prompt creation checklist
* The title describes the job, not just the topic.
* Variables use the `{{variable}}` format and are explained in the instruction.
* Categories and tags match how your team will search.
* Visibility and organization sharing are intentional.
* The Prompt has been tested with normal, incomplete, and edge-case inputs.
## 8. Create and refine
1. Review the title, description, content, categories, tags, organization sharing, and visibility.
2. Select **Create Prompt**.
3. Open the new Prompt from your library and run it with representative inputs.
4. Compare the result with your intended output, revise the instruction, and repeat until it is reliable.
**Tip:** Keep examples and expected output formats close to the instruction. Clear inputs and constraints make a Prompt easier for someone else to reuse.
## Prompt creation checklist
* The title describes the job, not just the topic.
* Variables use the `{{variable}}` format and are explained in the instruction.
* Categories and tags match how your team will search.
* Visibility and organization sharing are intentional.
* The Prompt has been tested with normal, incomplete, and edge-case inputs.